Invoicing & Billing - Receipt
General Info
A Receipt is a document that specifies the prices suggested for the products or services and is provided to your prospective customer. When the Receipt is sent to your customer, you commit to the desired rate stated in the Receipt and is not expected to budge.
Create a Receipt
1. On the left menu, choose Sales > Receipt. Choose New > Create New button on the top right.
2. Enter all necessary information and choose Save & Stay floating button.
| Column | Description |
|---|---|
| Ref Code | Internal reference code for your own reference. |
| Version | Any numeric value. You can leave it blank and by default it will have value 1 |
| Date | The Receipt document date. |
| Due Date | The date by which the Receipt is valid. You can select Payment Terms to trigger the auto calculated Due Date. |
| Customer | The party who request for the Receipt. |
| Order No | Order number from the customer who request the Receipt (if any). |
| Sales Person | The Sales Person who responsible for the Receipt or the deal. |
| Bill To | The contact person of the selected customer. All bills related will be sent to this contact. |
| Payment Terms | To specify when the customer should make the payment if the deal is succeed. Select the Payment Terms option value will trigger the recalculation of Due Date. |
| Payment Type | To specify how the customer should make the payment. |
| Currency | The currency used in this Receipt. Only 1 currency allowed in a single Receipt. |
| Bank Acc | The bank account which the customer should make payment to. |
| Ship To | The person whom the goods will be delivered to. |
| Shipping Date | The date when the goods will be delivered. |
| Shipping Terms | The transport and the carrier. |
| Notes | Some notes for the person who receive the Receipt. You can also set a Default Notes for all receipts. |
| Remarks | Some internal remarks regarding to this Receipt. |
| Keyword | Enter some meaningful keywords that is related to this document which will allow you to search the Receipt easily. |
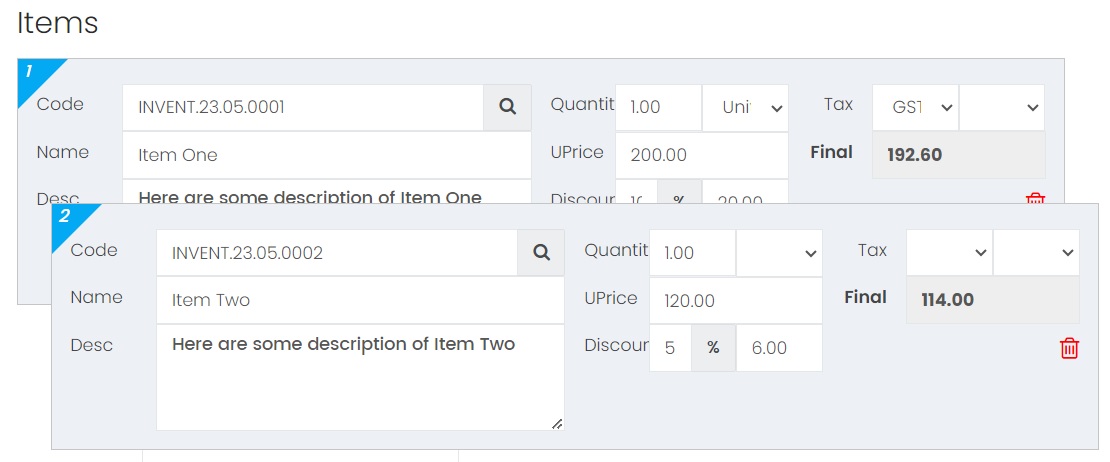
| Items | The detail information of the items or services. If the item is defined in your Inventory Database, choose the magnifier button beside the Code to retrieve the item information from database. Otherwise you may specify any item code in the Code column. Code - reference code of the item or service. Name - a short name of the item or service. Desc - detail description regarding the item or service. Quantity - a numeric value for quantity, with a magnitude of a quantity. UPrice - the price of single quantity. Discount - you can enter the discount percentage (%) or the discount amount. Tax - tax code applied to this item. You can define up to 2 tax code for each item. Final - the final amount of this item after discount and taxation. |
| Sub Total | The total amount calculated from all items price. |
| Additional Tax | You have the option to apply the tax code on the total amount, instead of apply the tax code to each of the items. |
| Additional Discount | Another discount applied to the sub total amount. |
| Shipping | Shipping cost applied. |
| Total | The final grand total amount of the Receipt. |
| Total in Word | The total amount described in text format. |
3. Click button + Add Row to add more items or services.
4. Click on the red color dusbin button to remove item.
5. Drag the item using mouse cursor to reset the sequence of the items.

6. You can save the Receipt as Draft or Generated Document. If the Receipt is saved as draft, there is not reference code given. However, if it is saved as Generated Document, a unique reference code will be generated and give to this document.
Attachment
Attach any documents that is related to this Receipt.
Document Security
System Admin and the owner of the Receipt can lock a document once it is completed to avoid the document been edited or deleted accidentally. It can be locked or unlocked anytime.

List of activities perform on this Receipt with timestamp.
Preview
Preview the Receipt using the pre-defined template.
Next topic: Create a Receipt
Previous topic: Hide Inventory Pricee
Need help?
Connect with us
New to Xin 365?
Sign up today